Don't Pick It!
Don't Pick It!
I think most of us are famous for this, myself included, but for the sake of our precious nails we need to stop picking at our gel polish and start taking it off the right way!
In today's post I will take us through the proper steps of safely removing gel polish at home. However, my personal advice is to always try and have a licensed nail technician take your gel polish off if you have the funds and time to do so.

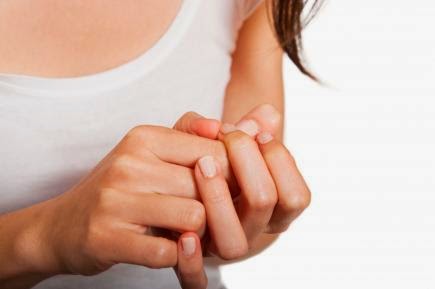
(Here is a detail image of damage that can be done to your nail if you do not remove gel polish correctly.)
Part 1: Set up your work area
To minimize the damage to you nail plate you want to make sure you have the right tools for removing your gel polish. Here are the key items you will need, and why, to do the job right:
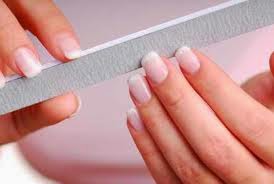
- Nail file - for roughing up the surface of the nail polish
- Acetone - this breaks down the polish and makes it easy to come off
- Ten small cotton balls (or five large one pulled in half) - to soak in the acetone
- Aluminum foil cut or ripped to mold around the tips of your fingers - this foil holds the acetone soaked cotton ball onto your nail.
- Orange wood stick or wooden pusher - to push the gel polish off of your nail
- Paper towels or towels you don't mind getting messy - to catch the flakes of polish, dripping acetone etc without damaging the surface you are working on.
- Trash can - don't put gel polish flakes or Acetone down the sink!
- Four-way buffer - to clean your nails up when you are done
- Sink, soap, water, and towel - to wash and dry your hands when you are done
- Lotion - to moisturize your hands at the very end

The good thing about all of these items is that you can purchase them at your local Wal-mart or beauty supply store. If you have trouble finding pure acetone, try purchasing an gel polish remover by one of the big brands like OPI.
Part 2: Soak the nail
One thing you need to have when taking off your gel polish is TIME. This is not a quick process. Plan on at least 15 minutes for soaking and then another 20-30 for pushing the polish off and re-soaking if necessary. I like to put on a good movie or catch up on my favorite shows while I take of my gel polish.

Here are the steps for soaking your nails:
- First, using a nail file, scratch the surface of the polish a bit - Do Not file all the way down to your nail plate! Just rough up the surface so that the acetone break down will go a bit quicker.
- Pour acetone onto a piece of cotton ball that fits onto your nails plate. Don't be shy either, you don't want the acetone to dry up fast. Be liberal with your use of acetone. Drippy cotton is good!
- Place the soaked cotton on top of your nail plate and mold a piece of foil around the top to hold it into place atop the nail.
- repeat steps 2 and 3 until all of your nails are covered.
- Wait.
- Wait a little longer.
- Peek if you must...
- Keep waiting for at least 15 minutes.
Part 3: Pushing off the polish
Notice I said "pushing" and not scraping or peeling...If you are scraping or peeling the polish off, you haven't waited long enough and my need to reapply acetone and re-soak a while long. Different gel polishes have different chemical make-ups and thus you may have a gel polish that takes longer to remove.

Here are the steps for pushing off your polish:
- Slide the foil off of the tip of your finger, cotton included. This will allow you the opportunity to replace the foils and soak your nails again if the polish is still too hard.
- Using and orange wood stick or wooden pusher, push off the gel polish. Using a wooden tool is safer and more effective that your own nails or even a metal tool. Your nails are Jewels, Not Tools and metal tools can scratch the nail plate if they are not used correctly. If you are having to use a lot of force, just re-soak them again. Don't Force It.
- Repeat steps one and two until you have removed the gel polish completely.

(Here is a picture of wooden pushers, I prefer the one on the top right, but either one will do the trick.)
Part 4: Tidy up your nails
At this point, you can go in one of two directions: One, you can finish up for the night and paint your nails again another day or Two, you can give yourself an at home mani. For this post, I will post the steps for Option One. However, if you are interested in giving yourself an at home manicure and painting your nails again, check out one of my previous posts A Lasting Home Mani, and start the manicure as if your polish is already removed.
Here are the steps for tidying up your nails after removing your gel polish:
- Wash your hands with warm soap and water (if you have a sugar scrub now would be the time to use it ;-] ) and dry them with a clean towel.
- If there is any remaining polish use the courser side of our three way buffer to gently buff it away. Then use the two other sides to shine up your nails.
- Wash and dry your hands again to remove any of the buffing dust from your hands.
- Scoop up all of your used tolls and dispose of them into the trash. If you have a bowl of Acetone, use extra paper towels to soak up the excess and throw that in the garbage as well. Never put any of this stuff down your drain!
- Moisturize! Use your favorite lotion and moisturize your hands and nails. Acetone dries you out bad! If you have any cuticle oil, drop a drop on each nail before you rub in your lotion and this will totally help lock in moisture and keep you nails and surrounding skin looking beautiful!
Here are a few of my favorite products I like to use when finishing up my gel polish removal:


A 4-way buffer Julep Glycolic Hand Scrub


Cuccio Cuticle Oil Qtica Smart Spa Lotion
For those of you who are embarking on removing your own gel polish, I hope this post helps! Just remember that your nails are worth the time, so please don't pick off your polish and do try to remove it the right way. If you ever have any questions or concerns regarding any of the information on my post, please do not hesitate to contact me! I would love to answer your questions or field your comments.
Be Radiant!
Amanda
#fiftytwoweeksofnails
@theradiantamanda
**Disclaimer: As a nail technician I can neither treat or diagnose nail ailments. If you suspect that you have a serious nail ailment, I suggest you seek help from your family doctor, podiatrist or dermatologist.

Comments
Post a Comment
Leave your comments!